5 Steps to Create Defensible Space Around Your Colorado Home
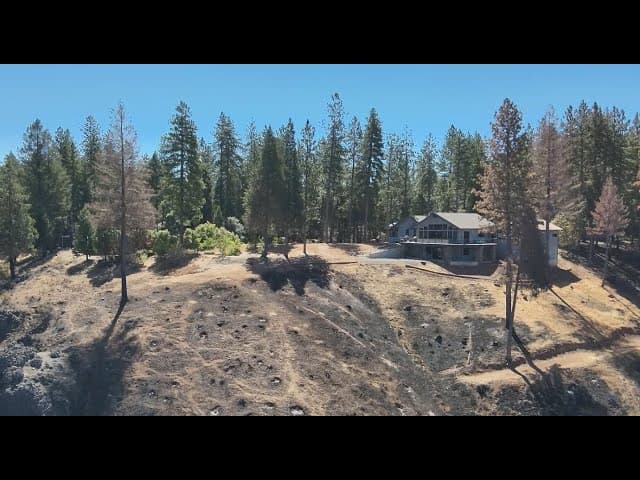
Wildfire can feel like a force you can't do anything about. It isn't. Decades of post-fire research point to the same conclusion: the condition of your home and the 100 feet around it largely determines whether it survives. That zone is called defensible space, and creating it is the highest-return work you can do.
Here's the part most homeowners get wrong — defensible space isn't about clear-cutting your property or turning it into a moonscape. It's about disrupting the specific ways fire and embers reach your home. Done right, it keeps your trees, your privacy, and your mountain character intact while dramatically lowering your risk.
Below are the five steps that matter most, roughly in priority order. Start at the house and work outward.
Step 1: Clear the first five feet (Zone 0)
If you only do one thing, do this. The five feet immediately around your home — what the Colorado State Forest Service calls Zone 0 — is the most important and the most overlooked.
During a wildfire, the biggest threat to most homes isn't a wall of flame. It's wind-blown embers that land in receptive fuels right against the structure and ignite it. Bark mulch beds, dead leaves, firewood stacked against siding, a plastic doormat, juniper shrubs under a window — these are how homes catch.
In this zone:
- Replace combustible mulch with rock, gravel, or bare soil.
- Remove dead plants, leaves, and pine needles — especially from against the foundation.
- Move firewood piles and propane tanks well away from the house.
- Clear anything stored under decks and porches.
It's not glamorous work, but foot for foot, it's the most valuable.
Step 2: Clean your roof, gutters, and deck
Your roof is the largest horizontal surface on your property, and your gutters are perfect ember traps. A single ember in a gutter full of dry pine needles can start the fire that takes the house.
- Clear needles and leaves off the roof and out of the gutters.
- Sweep debris from between deck boards and from corners where it collects.
- Check that vents are screened with fine (1/8-inch) metal mesh so embers can't blow into the attic or crawlspace.
This is maintenance, not a one-time project. In ponderosa and lodgepole country, plan on doing it at least once a year — more if you're under heavy canopy.
Step 3: Remove ladder fuels in Zone 1 (5–30 feet)
"Ladder fuels" are exactly what they sound like: vegetation that lets fire climb from the ground into the tree canopy — and from there, toward your home. Think tall grass under shrubs, shrubs under low tree branches, low branches reaching toward taller trees.
In the 5-to-30-foot zone:
- Prune the lower branches of mature trees up off the ground (generally 6–10 feet, but never more than a third of the tree's height).
- Create space between shrubs and trees so fire can't ladder up.
- Remove dead vegetation, and keep grass mowed low.
- Space plantings into small, separated groups rather than continuous beds.
The goal isn't bare ground — it's breaking the continuous path fire would otherwise follow to your house.
Step 4: Thin and space trees in Zone 2 (30–100 feet)
Farther out, the job shifts from removing fuels entirely to spacing them. A dense stand of trees with interlocking crowns lets a fire move through the canopy fast and hot. Spacing the crowns slows it down and helps drop it to the ground, where it's far easier to control.
- Aim for separation between tree crowns (the right distance depends on slope — steeper slopes need more).
- Favor keeping the healthiest, most fire-resistant trees.
- Remove dead, diseased, and "dog-hair" thickets of small-diameter trees.
- Clean up the dead-and-down material you create — don't leave slash piles sitting through fire season.
This is where experience matters. Good thinning improves forest health and your view; bad thinning damages the trees you keep and leaves a mess. There's real skill in choosing what stays.
Step 5: Document everything (especially now)
This step is new, and under Colorado's HB 1182 it's become essential. Mitigation work that isn't documented is invisible to your insurer — and starting in 2026, documented mitigation is part of how your wildfire risk and premium are evaluated.
Before you start cutting, and again when you finish, capture:
- Before-and-after photos of each area you treat.
- Dated records of what was done and when.
- A simple property map marking the zones you've cleared.
If a professional does the work, ask for a documentation package built for insurers — itemized invoice, photos, map, and an inspection report. It's the difference between "I cleared some brush" and provable risk reduction your carrier can credit.
The bottom line
You don't have to do all of this in a weekend, and you don't have to do it alone. Start at the house and work outward: clear the first five feet, clean the roof and gutters, cut the ladder fuels, space the trees, and document as you go. Each step makes your home meaningfully safer — and gives you something solid to show your insurer.
If you'd like a professional eye on your property, that's exactly what we do. A free assessment will tell you where your risk actually is and what to prioritize first.